-
Support Centre
-
Quick Videos
-
- How To Limit The Number Of Items Per Order
- How To Enable The Pre-Authorization Security Deposit At Delivery
- How To Upload The Site Background Picture
- How To Enable Sale Taxes For Used SKU Items
- How To Set The Time Range Duration
- How To Set The Hourly And Daily Durations
- How To Set A Seasonal Duration
- How To Enable/Disable The Duration
- How To Set A Season Period
- How To Set The Activity Range
- How To Display The Price Of The Item Including Tax
- How To Turn Off Displaying The Packages Tab On The Order Form
- How To Set The Order Limitation
- How To Change The Walk-In Category Visibility
- How To Hide The Product Description
- How To Enable/Disable The Re-Ordering Process
- How To Enable/Disable Multiple Renters
- How To Enable/Disable The Availability Calendar On The Order Form
- How To Enable/Disable Skipping The Credit Card Entry
- How To Enable/Disable Sending Emails To The Additional Renters
- How To Display The Product Option On The Order Form
- Use Parameters On The Waiver
- Enable Preauthorization
- Show Remaining Articles (8) Collapse Articles
-
- How To Set A Customized Email Opening/Closing Paragraph
- How to setup CC emails?
- How To Set On-Screen Notifications On The Order Form
- How To Set Auto SMS
- How To Enable/Disable Sending The Closing Order Email
- How To Enable/Disable Sending The Cancelled Order Email
- How To Create A New Message Template
- Edit SMS Reminder For Return Items
- Set SMS Reminder Triggers For Rent Order’s “Start and Finish”
- Set Auto SMS For Delivered Orders
-
- How To Track Products Based On SKU
- How To Track Products Based On Quantity
- How To Set The Security Deposit For The Products
- How To Enable The Daily Drop-off/Pickup During Rental Period
- How to assign products attributes group?
- How to upload category image?
- How to bundle rental items?
- How to assign renter attributes?
- Add Short Product Details
- Add Detailed Product Description
-
Getting Started
-
Business Information
-
Location Settings
-
Categories
-
Products
-
Payment Setting
-
Pricing
-
Activity Settings
-
Availability Calendar
-
Customers
-
Reservation
-
Delivery
-
Staff Management
-
Mobile App
-
Quick Sale
-
SMS
-
Tours
-
Reports
-
FAQs
-
- How can I update my credit card information on the client portal?
- How can I see my Rentrax invoice?
- How I can reset my password when I forgot it?
- How can I change my subscription plan?
- How Can I Subscribe to Sending SMS?
- How can I put my subscription on park mode?
- What are the web addresses I need to keep in mind for my Rentrax system?
-
- I Have a Few New Products, How Can I ADD Them to My Inventory?
- For some of my changes, the system is asking for a password? What is it and how I can set it?
- How can I change one existing SKU in the system?
- How Can I Create a Simple Coupon?
- How can I add a new price for my new products?
- How can I set my business email address and the one I want to receive confirmations email with?
- How do we delete a user?
- Which report can we use to see coupons that have been created?
- Why do some of the inventories in my availability calendar have stars on the side?
- How can I change my password?
-
- How can I add a size option to my product on the order form?
- How can I hide a product on my online booking page?
- We are closed on some days. How can I disable these dates on my online booking page?
- I added price templates, but they are not showing up on the order form
- How can I add a message to the order form?
-
-
Coupons
Tour Reservation Page
How to make a tour reservation?
Rentrax has an online & back-end reservation page for customers to make tour orders by themselves, or by rental store staff to make the order on behalf of customers.
Let’s see configurations and settings for rental behaviors in Rentrax, adjust and set them to different values and options based on your different business requirements. Then we can do operations to create and manage the tours/events.
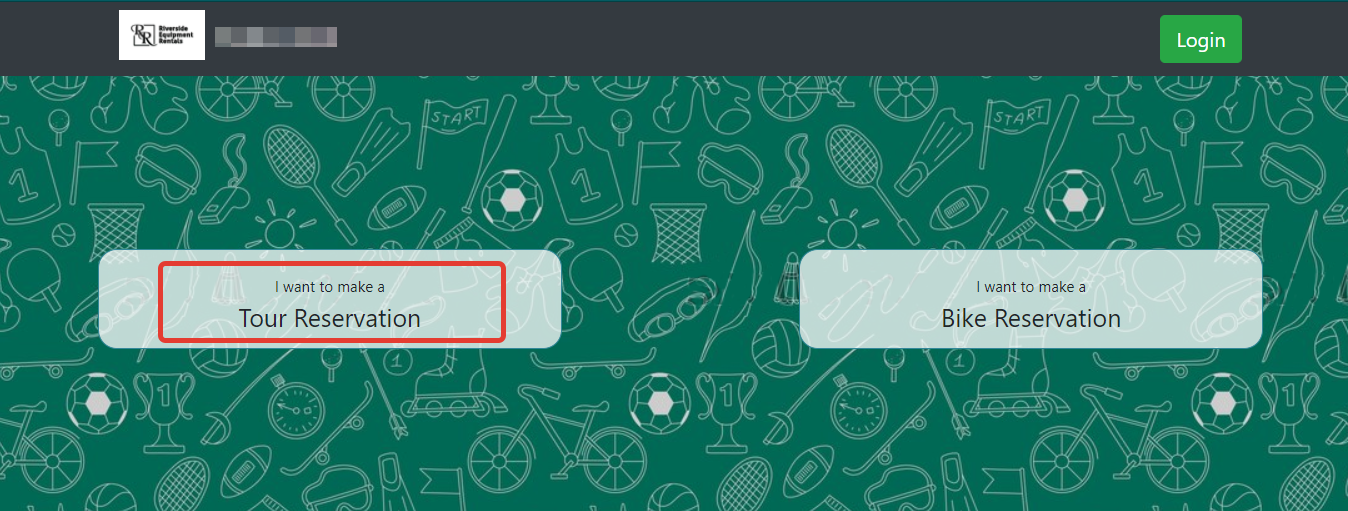
To create the tour reservation, a walk-in customer/online customer may click on the “I want to make a Tour Reservation”. Go to the tour settings, under general settings you may customize the order form according to your choice. For online reservations, you can able to set an iframe on your website.
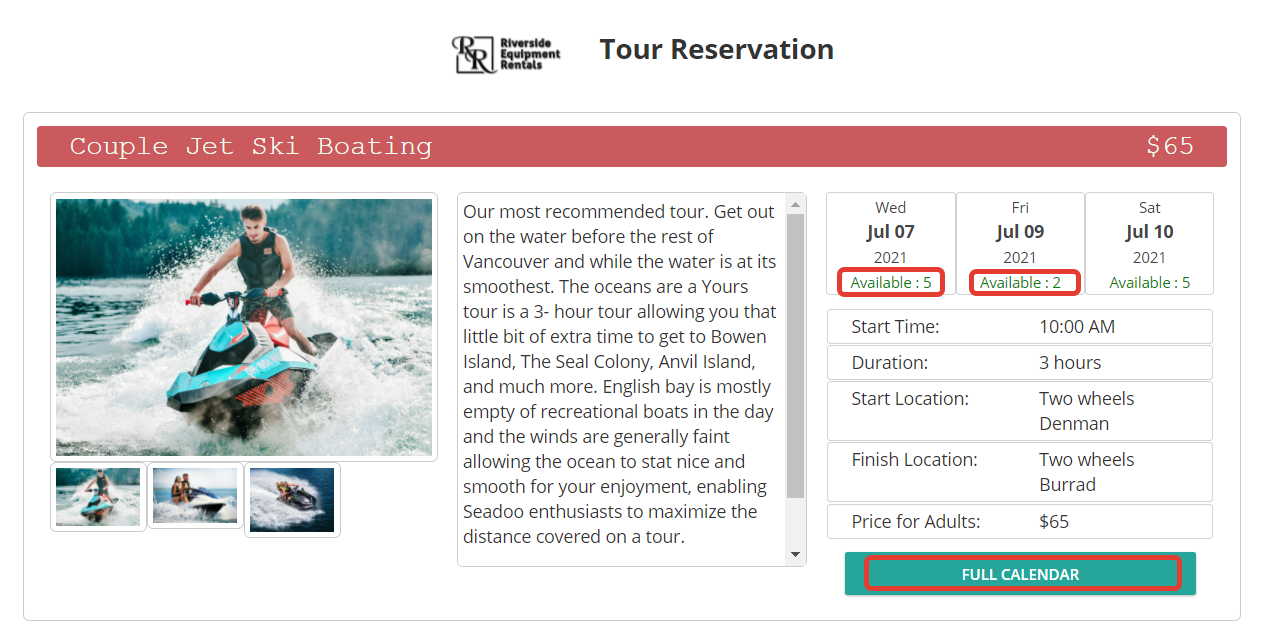
Full Calendar
By clicking on the “Full calendar” it will display the future events to book.
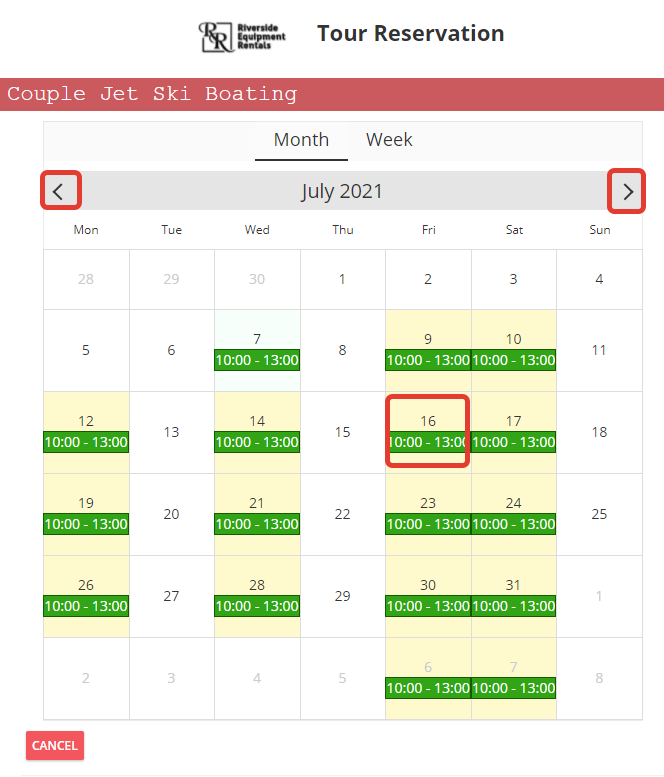
Click on the particular cell to select the date for making a reservation. Use the right & left arrows to see the future spots.
Once the date is selection is done you may see the order form. Click on the “Change” button in case if there are any changes with the dates.
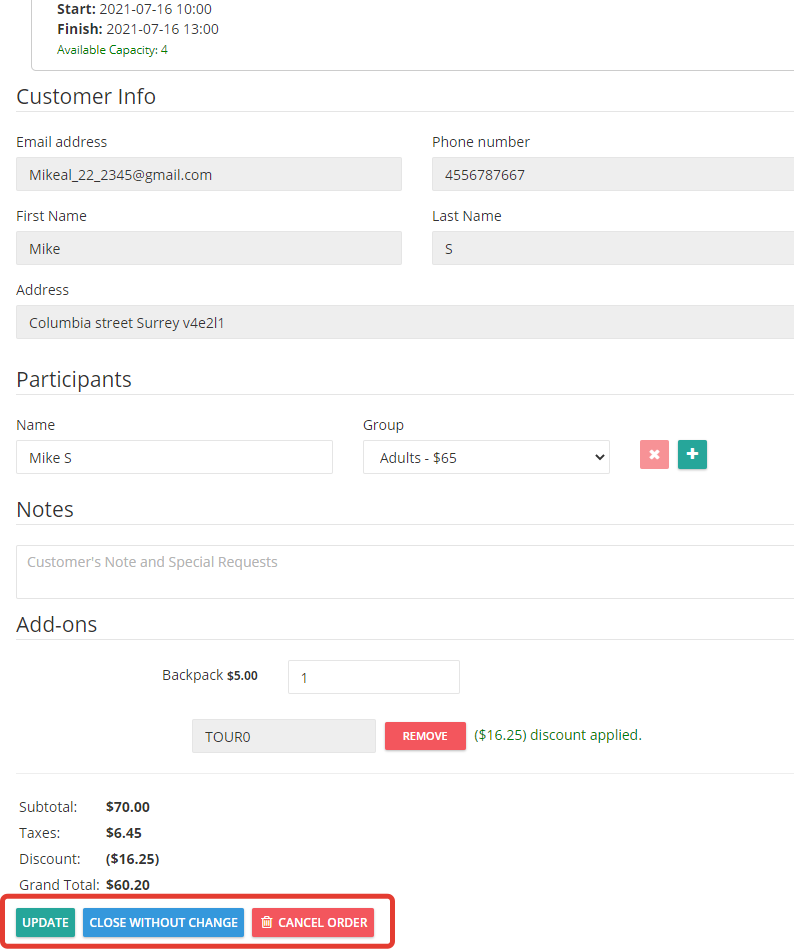
Click on the “+” icon to add another participant to the order.
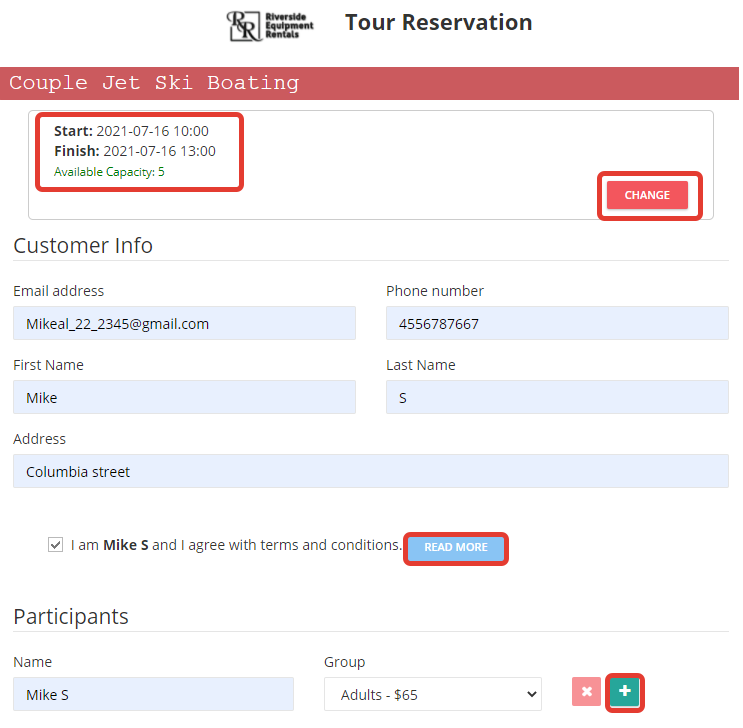
By clicking on the “Note” button end-users can add any special requests or notes. Add-ons are available at an extra cost and can be added to the order.
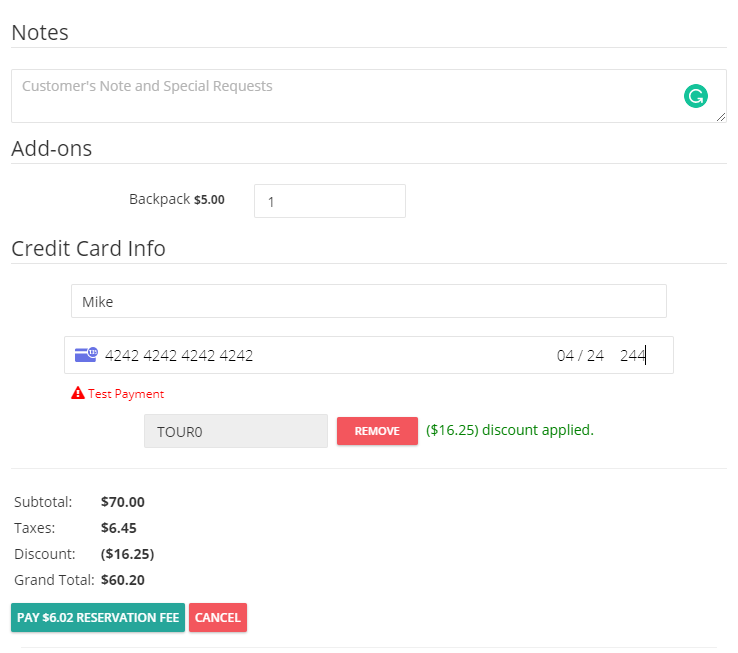
Once the reservation is placed, the customer will receive an auto email. If the reservation is pending or confirmed based on the setting, the customer can edit the order and make some changes to the order like adding more participants, add-on, & cancel orders, etc.
In the main dashboard, click on Tour Reservations under the OPERATIONS section or click on Tour Reservations from the sidebar menu.

Here, you can manage and apply actions on customer’s reservations.
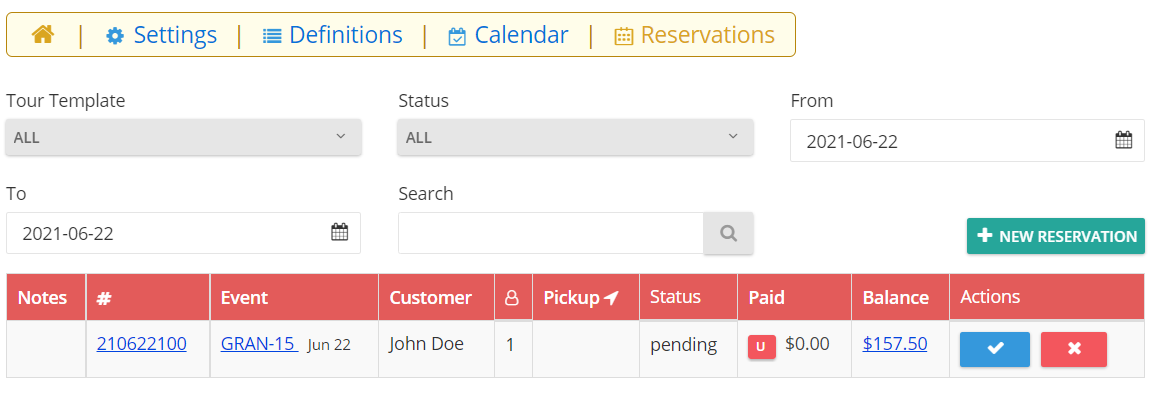
You could also sort reservations by Tour Template, Status, and Date. You could also search for a customer’s reservations by name or number.
There are actions available beside each reservation.
Depending on the status, we can confirm, check-in, check-out, and close reservations. These actions are present in the “Actions” column of the table.